
Online Service
Contact Information
Call & WeChat:

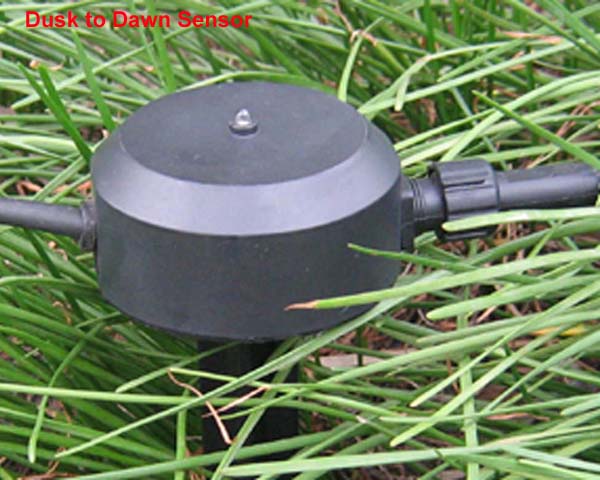
Dusk to Dawn Sensor
- Product Details
- Download
Switch the light ON at dusk and OFF at dawn.
12V AC, 105 Watt
1.5m cable with plug & play connector
IP44 rated.
Included mouting spike.


usk To Dawn Sensor
Switch light ON at dusk and OFF at dawn.
Ground Stake Mounting :
1. Place washer (4) on the ground stake (6) in the recess provided for this purpose (Abb.1).
2. Place sensor (1) on the stake and screw counter-clockwise until tight (Abb.3).
3. Insert the sensor with stake directly into the ground at the desired location.
Threaded Brass Insert Mounting:
1. Drill a hole into the sub-base and insert brass sleeve into the hole.
2. Screw sensor into the insert.
i Note:
Choose a location for the sensor where it is neither covered, nor exposed to excessive dirt.
A covered or soiled sensor will be unable to detect any changes in light and thus will not switch your lights on and off correctly.
1. Connect the plug of the sensor (3) to the transformer and tighten the nut.
2. Connect the plug of your light with the sensor (Abb.4) and tighten the nut (Abb.5).
DANGER! Electric shock!
Do not connect lights to high voltage, only power lights with GARLUX series low
voltage 12VAC power supply.
Use only original GARLUX spare parts.
Protect power cable from heat, oil and sharp edges.
If you use the light(s) under water, ensure that the light fixture and cable are undamaged.
Technical data
Rated voltage: 12 ~16V DC / 12V AC
Total power consumption: max 105 W
Power cable length: 1.

Dusk To Dawn Sensor
Switch light ON at dusk and OFF at dawn.
Ground Stake Mounting :
1. Place washer (4) on the ground stake (6) in the recess provided for this purpose (Abb.1).
2. Place sensor (1) on the stake and screw counter-clockwise until tight (Abb.3).
3. Insert the sensor with stake directly into the ground at the desired location.
Threaded Brass Insert Mounting:
1. Drill a hole into the sub-base and insert brass sleeve into the hole.
2. Screw sensor into the insert.
i Note:
Choose a location for the sensor where it is neither covered, nor exposed to excessive dirt.
A covered or soiled sensor will be unable to detect any changes in light and thus will not switch your lights on and off correctly.
1. Connect the plug of the sensor (3) to the transformer and tighten the nut.
2. Connect the plug of your light with the sensor (Abb.4) and tighten the nut (Abb.5).
DANGER! Electric shock!
Do not connect lights to high voltage, only power lights with GARLUX series low
voltage 12VAC power supply.
Use only original GARLUX spare parts.
Protect power cable from heat, oil and sharp edges.
If you use the light(s) under water, ensure that the light fixture and cable are undamaged.
Technical data
Rated voltage: 12 ~16V DC / 12V AC
Total power consumption: max 105 W
Power cable length: 1.5 m (59 in)
IP rating: IP44
Previous